 I have a thing about product photography, and when I'm reviewing small retailers' websites I'm always saying the same things, so it seems to make sense to write about them here.
What some people don't seem to realise is just how important each and every picture on a website is. The saying 'Every picture is worth a thousand words' (and if you want to find out where it originated from take a look here) is in no way an exaggeration, particularly if you are trying to get people to buy product from you.
I know full well, from my dark and distant past when I ran numerous photo shoots, and had the fun and priviledge of working with late Patrick Lichfield amongst others, that photography can be incredibly expensive. In those days we were talking about film and 18 model shots a day if you were lucky (for fashion) and that was considered a lot. In fact I remember having to pay one still famous model an extra couple of hundred pounds to do just one more shot and still finish by 3.30pm. Those were the days - not.
Now of course everything's gone digital, those who said that 'digital just didn't offer the atmosphere', and there were loads of them, have been sideswiped right out of the picture and everything is instantly deletable, photoshopable, enhanceable and changeable in too many ways to mention.
For the small retailer, without the knowledge of product photography, the whole thing is a minefield, so my main advice is keep it simple, but stick to these rules:
1. Unless you are an expert, do not go for model photography. It will be expensive (or your model may portray the wrong emphasis) and you may end up offering something to the detriment of your product.
2. Never, ever use an amateur model. Some of the worst pictures I have ever seen have been taken on 'friends of the family' or 'a friend who wants to go into modelling'.
3. If you are going to go the 'do it yourself' route consider investing in a stills set-up such as Cubelite and make sure that you learn everything about it first. This will be the cheapest option if you can get it to work for you - a little time and effort will pay off here.
Mike Summerfield, of Cubelite, offered the following comments 'With a system such as this you don't need to be a professional photographer, it's easy to set up, including the lighting and all your shots will be consistent. You also own the copyright to your images and have complete control of your photography. You can take pictures as and when you need to.'
4. Make sure that all the product pictures you show on your website are the same size and shape. This uniformity makes a great difference to how your pages will be looked at.
5. Unless they're on a stylish backdrop, such as the ones at Nordic House, your background needs to be the same throughout, lit the same and in the same style, anything else will look messy.
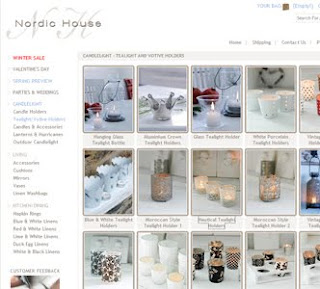
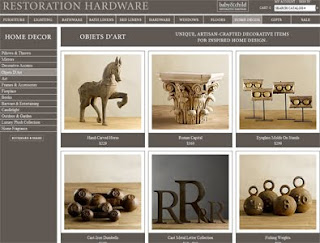
6. Take a look at how the 'big boys' are doing it. Two of my favourite websites for stills are Restoration Hardware and Williams Sonoma, both from the US. Don't get me wrong, I know that these shots have cost a lot of money, but everyone can learn from the ideas behind them, the superb page layouts, and try for something as near as possible. Going back to Nordic House - this is a small online retailer doing something beautifully, there's no reason why you can't as well.
7. Back to fashion photography - be very careful about mannequins and how they're used, and also very careful about cut-out shots on a white background, leaving products floating on the page. Personally I think this is not a great look and will undoubtably reduce conversion rates. If you want examples please ask me.
I know, I've said it before, but take a look at what the greats such as Net-a-Porter.com are doing, who never put a foot wrong. There's no better online example for fashion in my opinion, which is slightly annoying, because it would be great to see someone take up the mantle, but I don't think that's likely to happen soon. From stills to model shots, they're all excellent.
8. Concentrate on the items that you think you're going to be selling in depth and spend money there, offering more detail shots. Whatever you're selling, from lingerie to lighting, you're going to be up against stiff competition. Don't waste time and effort on small return pieces. Go for depth and quality.
9. Understand that if you spend a bit of time you can learn to do your own photography, and that if you do you will save heaps. There is no quick fix however, you'll need to learn how to do it properly.
10. Invest in the best camera you can afford, and take advice before you buy. If you think about how much this is going to save you in the long run, whatever you spend will be a true investment.
11. For best results you will need Photoshop, and to learn how to use that as well. You don't actually need to become an all time expert, the basics will serve you very well (I use it all the time). You may already be using it, but if not it's a great program. I will admit that my eldest son gave it to me a few years back, and he taught me how to use it!
Finally a story from my shoot organisation days - we were shooting swimwear on the top floor of the Berkeley Hotel in London where there's a gorgeous swimming pool. Unfortunately all the shots through the almost Italianate windows were of a dirty grey London day, so our photographer just cut them out and superimposed a real Italian sunny backdrop which looked superb. Digital photography has certainly made an unbelieveable difference to what we're all doing now.